Wednesday, October 25, 2006

4 Generations of Tortilla Makers

Today Jessica inspired me to try my hand again at making flour tortillas. You see, I grew up watching my mom make homemade flour tortillas on a weekly basis. She didn't measure anything, and she made it look so easy. Several times she attempted to teach me how to make tortillas, and as long as she made the dough they came out okay. All right, so my tortillas were shaped like many of the states of America, not round like my mom's, but still they tasted great if she made the dough.

When I got married I once again wanted to make flour tortillas. As a young mother I would often visit my beloved grandma and my great aunt Jennie, and I would beg them to teach me how to make tortillas. I remember the two of them laughing at the way I rolled out the dough and the shapes that transpired underneath my rolling pin. I remember Grandma telling me that there was a right and a wrong side to every tortilla, and I didn't dare lay the rolled out dough on the hot griddle facing the wrong direction. I remember the dough encrusted in Grandma's ring as she attempted to pick it out after we were finished making the tortillas. I remember Grandma sending home a dozen tortillas, beans, and green chili for Mark to enjoy. She knew how much my husband loved her good cooking.

I never did learn to make good tortillas, but Grandma did teach me how to crochet. She also taught me about love and laughter and hospitality and family loyalty and so many other things that I can't begin to express. Two years ago (or was it three?) in October my grandma, Tillie Gomez, died in her home. So many days I think of her, and I never stop missing her.

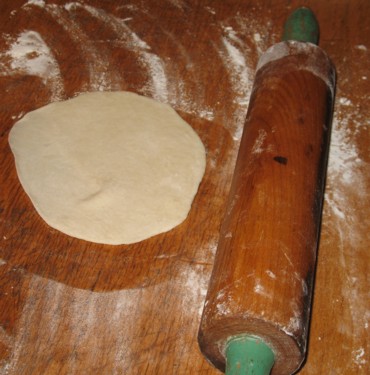
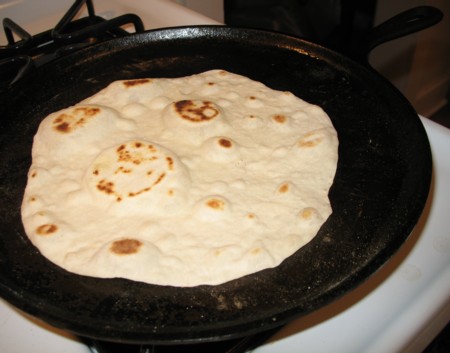
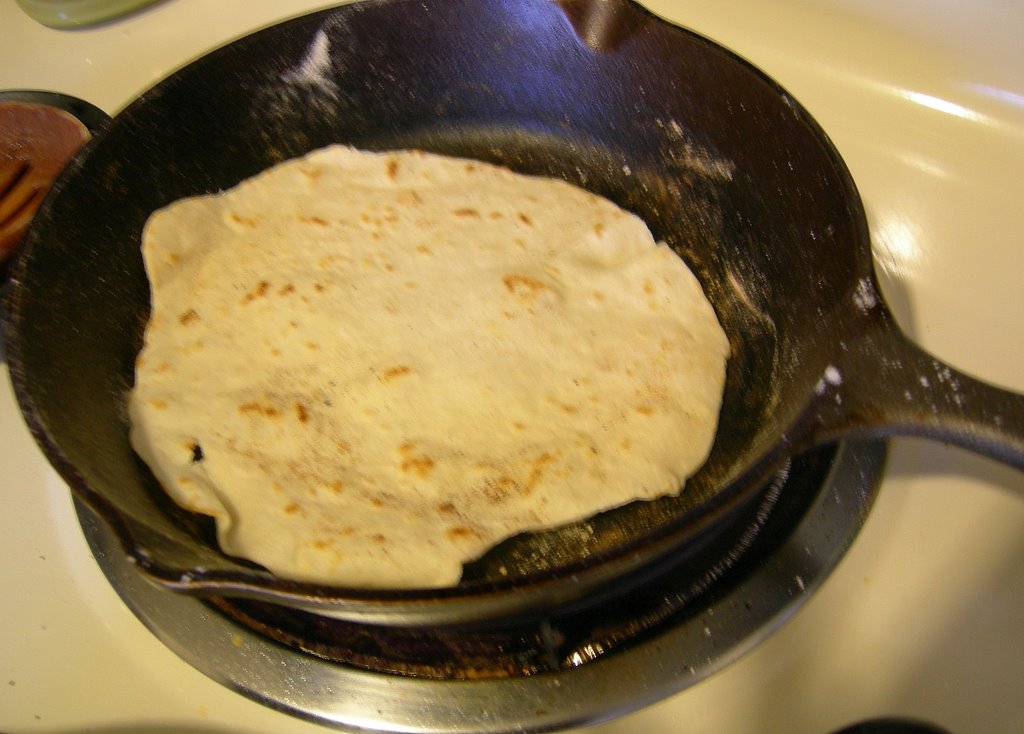
Today I finally made some tortillas, all by myself, that came out like they should. I'm sure mine don't taste as good as Grandma's tortillas, but they're still good. I think Grandma would be proud of me!


This picture was taken about 8 years ago. Four generations of tortilla makers!

Jessica is 15 years old here.

Mom, Grandma, Me, Jessica


Thank you, Jessica, for inspiring me today!


How to Make Flour Tortillas

Yesterday I made homemade tortillas, and they came out good (In the past when I've made them they've been dry and cracker-like). I guess this must be a good recipe, so I'm posting it.

Interesting article about flour tortillas

Flour Tortillas--make 12-18
Ingredients:
3 cups unbleached flour
2 tsp. baking powder
1 tsp. salt
4-6 Tbsp. vegetable shortening or lard
about 1 1/4 cups warm water

Mix dry ingredients in a large bowl.

Add vegetable shortening or lard. Or use a combination of half lard, half shortening.
Use a fork or a pastry cutter to cut in the shortening or just do it the old fashioned
way and use your hands.

Next add warm water a little at a time until your dough is soft and not sticky. You do
not need very hot water.

Knead the dough for a few minutes.

Now you will pull off pieces of dough to form about 12 small dough balls. Let them rest for at least 10 minutes, longer if you like. Cover with plastic wrap while they rest so they don't dry out.

This is a good time to heat up the skillet. Cast iron skillets and griddles work best. You will want to set it at medium to high heat. If it is too hot the tortillas will cook too fast.

Now you can roll out the dough with your tortilla rolling pin. It is a good idea to shape each ball into a disk shape and then dust each ball with a little flour just before you roll them out. Lay the rolling pin in the center of the dough ball and roll up, center and roll down. It is good to lift the dough and turn it. Again, rolling pin in the center and roll. Roll them out fairly thin.

Lay your tortilla on the hot skillet. It takes just a few seconds to cook. Flip to the other
side. When they are done it should have lots of nice brown speckles. Place them in a
towel. They are ready to be served!

Sunday, October 22, 2006

Chocolate Chip-Pumpkin Muffins

Chocolate Chip-Pumpkin Muffins

Prep:15 minutes
Bake: 20 minutes
Serves:18

1 2/3 c. flour
1 c. sugar
1 1/2 t. cinnamon
1 t. baking soda
3/4 t. ground mace
1/2 t. salt
1/2 t. baking powder
1/4 t. ground nutmeg
1/4 t. ground cloves
2 eggs
1 c. canned pumpkin
1/2 c. butter melted
1 c. semisweet chocolate pieces

Preheat oven to 350 degrees Lightly grease 18 muffin cups, or line muffin pans with paper bake cups.

In a large mixing bowl, stir together flour, sugar, cinnamon, baking soda, mace, salt, baking powder, nutmeg, and cloves. make a well in the center of the flour mixture.

In a smaller mixing bowl, beat eggs. Stir in pumpkin and melted butter. Add pumpkin mixture all at once to the flour mixture. Stir just until moistened (batter will be lumpy). Fold in chocolate chips.

Spoon the batter into prepared muffin cups, 2/3 full. Bake for 20-25 min. or until toothpick comes out clean. Serve warm.

These muffins were really good this week for breakfast. They are a basic, cake-like recipe with a fluffy texture, and a fairly mild taste.

Changes I made:
I sprinkles the chocolate chips on top rather then mixing them in. This conserved on chocolate chips.
I don't have ground mace, so I just omitted it.
I doubled the recipe and used half of the batter in a loaf pan for pumpkin bread. This seemed to work just fine. I froze the loaf for later.


Chocolate Pizzelles

Mom, here's that recipe for those Chocolate Pizzelles that I was telling you about from the Better Homes and Gardens, Celebrate the Season 2003 book. Let me know when you want to make pizzelles this Christmas, and I'll try to come and help you! I wish I could show you the picture of these, because they look so pretty.

Christmas is coming...That means lots of yummy goodies. Yeah!! If you read this blog, please feel free to share some of your favorite Christmas goodies. I'd love to try some new recipes this Christmas.

Chocolate Pizzelles

Prep 20 min.
Bake: 2 min. per cookie

1 1/2 cup hazelnuts, toasted
2 1/4 c flour
3 T unsweetened cocoa
1 T baking powder
3 eggs
1 c sugar
1/3 cup butter, melted and cooled
2 t vanilla
1 recipe chocolate glaze

Finely chop 1 cup of the hazelnuts; set aside. Process remaining 1/2 cup hazelnuts in a blender or food processor until very fine, but dry and not oily.

In medium mixing bowl, stir together ground hazelnuts, flour, cocoa, and baking powder, set aside.

In large mixing bowl, beat eggs with an electric mixer on high speed about 4 minutes, or until thick and lemon colored. Reduce speed to medium; gradually beat in sugar. Beat in the butter and vanilla. Add flour mixture beating on low until combined.

Heat an electric pizzelle iron according to the manufacturer's directions.

For each pizzelle, place a slightly rounded tablespoon of batter onto the pizzelle grid, slightly off-center toward the back. Close lid.

Bake according to manufacturer's directions (about 2 minutes, until golden.)

Turn warm pizzelle onto a cutting board, and cut in half or in quarters. Transfer to a paper towel to cool. Repeat with remaining batter.

Dip the rounded edge of each pizzelle piece into the chocolate glaze; dip into the reserved chopped hazelnuts. Place on a wire rack; let stand until glaze is set. Makes 36 pizzelle halves.

Chocolate Glaze

In a small bowl, stir together 1 1/2 cups powdered sugar, 3 T unsweetened cocoa powder, and 1/2 teaspoon vanilla. Stir in enough milk (2-3 T) to make of glazing consistency.

Friday, October 20, 2006

Steak Adventures

I did it! I learned how to cook a steak on my stovetop! Steak has been a craving with my pregnancy that I have just not gotten to indulge in much. On a whim I decided to try to cook some frozen steaks I had even though they weren't that high of quality (Top Sirloin Steaks, 3/4 " thick, about $3 a pound). I was so excited because they came out wonderful...much better then we expected. Along with the steaks, we had a green salad, and mashed potatoes. Justin was wonderful and mashed up the potatoes as I was cooking the steaks. I wish I had pictures because it was beautiful. First I gathered as much information about pan frying steaks as I could. This was important because I learned a lot that I didn't know.

Here are a few of the links where I gathered information:

A message board with lots of opinions
How to Cook the Perfect Steak
HGTV steaks
Pan Fried Strip Steak (with good photos)
Making a sauce with the drippings (good photos)
Everything you need to know about Cast Iron Skillets

Important things I learned:

Always use a cast iron skillet if possible.


The cast iron skillet must be heated to a very high temperature before meat is placed on it. I preheated my skillets in a 500 degree oven and then placed them on hot preheated burners.


Always let the steaks come to room temperature before cooking.


Marinate the steaks in some olive oil or use some olive oil in the pan.

Don't salt the meat ahead of time because this could draw some of the moisture out of it.


Don't stir them around as they cook on the stovetop. You want a black crust to form.

Don't overcook. I cooked my steaks 3 minutes on each side in a sizzleing hot skillet. The skillets were then placed in the 500 degree oven for 5-8 more minutes to finish cooking. Even then, by the time we ate them, they were completely cooked through, and I like a little pink in the center.

Use the drippings in the pan to make a sauce or gravy. Yummy!


Be prepared for lots of smoke!

Homeland Savings this week

For those of you that have a Homeland Grocery Store in town, go by the store and pick up one (or 20!) of their weekly ads. This week only, ( 10/18-10/24) each ad contains a coupon for one free can of Red Gold canned tomatoes. My mother-in-law gave me 5 of these coupons and I was able to use them at my local grocery down the street to get 5 free cans of diced tomatoes in one single transaction.

This is one coupon offer that seems to good to be true. You bet I'm going to be be getting more of these coupons and stocking up on diced tomatoes!

Jessica

Fun Free Kitchen Printouts From Martha Stewart

This is for all you crafty cooks...I thought these various printable lables and kitchen guides from Martha Stewart were so fun!

Old fashioned Decorative Jam Lables (see picture at left)

Easy to read Freezer Lables

Pie Chart-- basic recipes for 5 fruit fillings at the turn of a wheel. So cute!

Milk-bottle shaped Kitchen Equivalents and Substitutions list. I like the idea of laminating these and turning them into magnents.

Thanks to Mrs. Wilt for the links!

Friday, October 06, 2006

Chicken Parmesan

Today I was featured as a "guest chef" on another great cooking blog, Tammy's Recipes.

Check out this yummy recipe for Chicken Parmesan!

Have a great day!
Jessica

Cheddar-Sausage Scones

I served these lovely Chedder-Sausage Scones for breakfast this morning. Different than your usual scone, these are more like a breakfast biscuit with a sweet taste. I thought they were good served with fried eggs and hot apricot tea, and I would definitely make them again to serve at a breakfast brunch or potluck.

This recipe makes quite a bit--I cut it in half for Justin and me and we still had leftovers. I really liked these, but next time, I think I would cut out most of the sugar and add some salt for a more traditional flavor. Of course, then they would be less like scones, and more like biscuits... I guess it's just personal preference. =)

Jessica


Cheddar-Sausage Scones

Prep 20 minutes
Bake 12-15 minutes

1 12 oz. package pork sausage
3 1/4 cups flour
1/2 cup sugar
2 1/2 tsp baking powder
3/4 cup butter
1 1/2 cups shredded cheddar cheese
3/4 cup buttermilk or sour milk

Preheat oven to 400. In a skillet, cook sausage until brown, breaking meat into small pieces. Drain off fat and set aside.

In a large mising bowl, stir together flour, sugar, and baking powder. Using a pastry blender, cut in butter until mixture resembles coarse crumbs.

Stir in sausage and cheddar cheese. Make a well in the center of the flour mixture; add buttermilk all at once and stir just until moistened.

Turn dough out onto a lightly floured surface. Knead for 10-12 strokes or until dough is nearly smooth. Divide in half.

On a lightly floured surface, pat each half of the dough into a 3/4" thick circle. Using a 2 1/2" floured biscuit cutter, cut out dough. Place on an ungreased baking sheet, 1" apart.

Bake for 12-15 minutes or until golden. Serve warm. Make 16 scones.